Installing Oracle AIA 11g Foundation Pack on Linux 64bit
Installation of Oracle Application Intergration Architecture Foundation Pack (AIA) 11g including Oracle SOA Suite 11g with Oracle BAM 11g on Oracle Database XE 10g and Linux 64bit.
Assumptions:
- In this tutorial we use software version 11.1.1.2. You should always aim to use the latest available software, for example 11.1.1.7.
- This demo will be performed within VMware image. Personally, I don’t recommend to install AIA11g on 32bit OS.
- An image: Oracle Enterprise Linux 5U4 (64bit), 4GB of swap and 6GB of RAM, 20GB of disk space.
- Oracle Database: Express Edition 10g, only for development purposes and saving resources in vmware env.
- Download software from Oracle downlod website and only from Oracle.
- SOA 11g R1 Patch Set 1 (11.1.1.2.0) is required for AIA 11gR1.
- Use of Service Registry (11gR1) and Enterprise Repository (11gR1) is optional (not covered in this demo).
- AIA 11g R1 Certification Matrix is available here.
- AIA 11g R1 (software and docs) is available at eDelivery here:
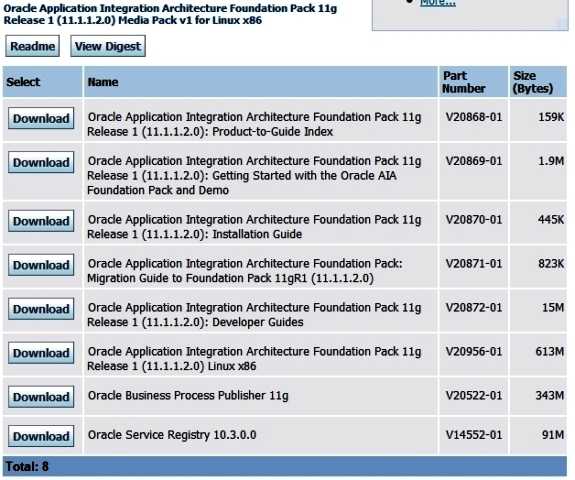
- This tutorial also covers ORACLE BAM since it is included in SOA Suite 11g
Download software and place it into /home/oracle/stage directory:
Database
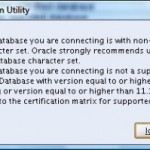
If you don’t already have an Oracle database installed, choose Oracle Express Edition for a small footprint database. (Oracle XE is suitable for development only. Ignore the warning during installation about the database version as that pertains to production installations.)
- Oracle Database Express Edition for Linux x86.
UPDATE: Oracle Database XE 11g R2 is now available. Install 11g instead of 10g.
- Oracle WebLogic Server 11gR1 (10.3) 64bit – Package Installer
- Repository Creation Utility (11.1.1.2.1)
- SOA Suite 11.1.1.2.0 Generic: 1.7 GB (Nov-2009)
- Oracle AIA 11gR1 (11.1.1.2.0) Linux x86 V20956-01.zip http://edelivery.oracle.com
Let’s roll:
Install the following software in the order it is shown.
- Install oracle database (Oracle XE 11g is available)
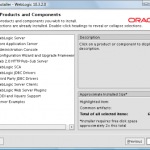
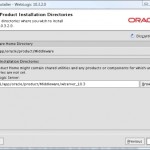
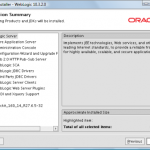
- Install WebLogic Server 10.3.2
- Execute Repository Creation Utility
- Install SOA Suite 11g
- Install AIA 11g
- Uninstall AIA 11g
Make sure that hostname is being set properly; if not – configure /etc/hosts:
# cat /etc/hosts

10.0.0.10 yourhostname.local yourhostname
Installing oracle xe:
# rpm -ivh /mnt/repository/stage/oracle/Oracle11GDB/oracle-xe-10.2.0.1-1.0.i386(2).rpm
# /etc/init.d/oracle-xe configure
Oracle Database 10g Express Edition Configuration

-------------------------------------------------
This will configure on-boot properties of Oracle Database 10g Express
Edition. The following questions will determine whether the database should
be starting upon system boot, the ports it will use, and the passwords that
will be used for database accounts. Press <Enter> to accept the defaults.
Ctrl-C will abort.

Specify the HTTP port that will be used for Oracle Application Express [8080]:

Specify a port that will be used for the database listener [1521]:

Specify a password to be used for database accounts. Note that the same
password will be used for SYS and SYSTEM. Oracle recommends the use of
different passwords for each database account. This can be done after
initial configuration: *****
Confirm the password:*****

Do you want Oracle Database 10g Express Edition to be started on boot (y/n) [y]:y

Starting Oracle Net Listener...Done
Configuring Database...Done
Starting Oracle Database 10g Express Edition Instance...Done
Installation Completed Successfully.
To access the Database Home Page go to "http://127.0.0.1:8080/apex"
To start/stop the database manually:
$ /usr/lib/oracle/xe/app/oracle/product/10.2.0/server/config/scripts/startdb.sh
$ /usr/lib/oracle/xe/app/oracle/product/10.2.0/server/config/scripts/stopdb.sh
To start the SQL*Plus console (GUI in Gnome)
TIP: Start xserver and create launcher on your desktop (Gnome):
Launcher’s path:
/usr/lib/oracle/xe/app/oracle/product/10.2.0/server/config/scripts/runsqlplus.sh
Configure database:
Below setting will prevent from error:
RCU-6083 during the Repository Creation. DB Init Param Prerequisite failure for: processes Required Value = 200, Current Value = 40 …
Run SQL*Plus and connect as SYSDBA
$ /usr/lib/oracle/xe/app/oracle/product/10.2.0/server/config/scripts/sqlplus.sh
SQL*Plus: Release 10.2.0.1.0 - Production on Sun Jun 12 22:18:13 2010
Copyright (c) 1982, 2005, Oracle. All rights reserved.
SQL> connect / as sysdba
Connected.
SQL> alter system set processes=200 scope=spfile;
SQL> startup force
ORACLE instance started.

Total System Global Area 805306368 bytes
Fixed Size 1261444 bytes
Variable Size 213909628 bytes
Database Buffers 587202560 bytes
Redo Buffers 2932736 bytes
Database mounted.
Database opened.
SQL>
2. Install WebLogic Server 10.3.2
Before we start, java jdk must be installed.
Download JDK from Oracle Website
Install jdk-6u20-linux-x64:
$ su -
# chmod +x jdk-6u20-linux-x64-rpm.bin
# ./jdk-6u20-linux-x64-rpm.bin
# exit
Run WebLogic Installer
$ cd /home/oracle/stage/SOASuite

$ ls -la
-rw-r--r-- 1 oracle oinstall 945517652 Jun 12 13:15 wls1032_generic.jar
[oracle@hostname SOASuite]$ /usr/java/jdk1.6.0_20/bin/java -d64 -jar wls1032_generic.jar
3. Execute Repository Creation Utility
[oracle@hostname SOASuite]$ unzip ofm_rcu_linux_11.1.1.2.1_disk1_1of1.zip
[oracle@hostname SOASuite]$ cd rcuHome/bin
[oracle@hostname bin]$ ./rcu
Run The Oracle Installer to install SOA Suite 11g
[oracle@hostname ~]$ cd /home/oracle/stage
[oracle@hostname stage]$ unzip ofm_soa_generic_11.1.1.2.0_disk1_1of1.zip -d soa11g
[oracle@hostname ~]$ cd /home/oracle/stage/soa11g/Disk1
[oracle@Disk1]$ ./runInstaller
Starting Oracle Universal Installer...
...
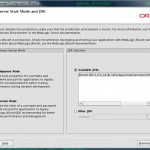
Please specify JRE/JDK location ( Ex. /home/jre ), <location>/bin/java should exist :
Specify the following path: /usr/java/jdk1.6.0_20
and hit enter;
Configure SOA Suite (including BAM) by creating WLS domain – Admin and Managed Servers in WebLogic
[oracle@host bin]$ cd /u01/app/oracle/product/Middleware/Oracle_SOA1/common/bin/
[oracle@host bin]$ ./config.sh
Start Admin & Managed Server (soa_server1, bam_server1) for SOA 11g R1
- Manual Start: Admin Server
[oracle@hostname ~]$ export SOA_HOME=/u01/app/oracle/product/Middleware
[oracle@hostname ~]$ $SOA_HOME/user_projects/domains/soa_domain/bin/startWebLogic.sh
- Starting SOA Server
[oracle@hostname ~]$ $SOA_HOME/user_projects/domains/soa_domain/bin/startManagedWebLogic.sh soa_server1
- Starting BAM Server (optional, don’t start for AIA installation – it saves system resources)
[oracle@hostname ~]$ $SOA_HOME/user_projects/domains/soa_domain/bin/startManagedWebLogic.sh bam_server1
TIP: In order to make your servers starting without asking for the username and the password create security directory and boot.properties file in each of these directories:
[oracle@hostname ~]$ export SOA_HOME=/u01/app/oracle/product/Middleware
[oracle@hostname ~]$ mkdir -p $SOA_HOME/user_projects/domains/soa_domain/servers/soa_server1/security
[oracle@hostname ~]$ mkdir -p $SOA_HOME/user_projects/domains/soa_domain/servers/bam_server1/security

[oracle@hostname ~]$ touch $SOA_HOME/user_projects/domains/soa_domain/servers/soa_server1/security/boot.properties
[oracle@hostname ~]$ touch $SOA_HOME/user_projects/domains/soa_domain/servers/bam_server1/security/boot.properties
Fill in all boot.properties files with appropriate entries; username and password:
username=weblogic
password=secret_password
Validate the installation; login to weblogic dashboards:
- http://hostname:7001/
- http://hostname:7001/em/
- http://hostname:7001/console/
- http://hostname:9001/OracleBAM (Sorry folks, Internet Explorer only)
Before we launch the AIA Installer we need to configure some settings.
- To configure JVM parameters:
Navigate to <Middleware home>/user_projects/domains/<domain_name>/bin. In Linux update the following parameters in setDomainEnv.sh file.
Search for the string USER_MEM_ARGS and modify as necessary.
[oracle@hostname ~]$ vi /u01/app/oracle/product/Middleware/user_projects/domains/soa_domain/bin/setDomainEnv.sh
 #ADD THIS LINE

USER_MEM_ARGS="-Xms2048m -Xmx2048m -XX:PermSize=256m -XX:MaxPermSize=512m -XX:AppendRatio=3 -XX:NewSize=1228m -XX:MaxNewSize=1228m -XX:SurvivorRatio=10"
Next, search for
WLS_JDBC_REMOTE_ENABLED="-Dweblogic.jdbc.remoteEnabled=false"
– set it to “true” and save changes.
- Increasing Memory to avoid Compilation Errors
To avoid out-of-memory errors during compilation of a SOA composite application, you need to increase the following memory settings.
To increase memory settings: open the ant-sca-compile.xml file in the SOA_HOME/bin directory.
[oracle@hostname ~]$ vi /u01/app/oracle/product/Middleware/Oracle_SOA1/bin/ant-sca-compile.xml
#Under the scac element, increase the following memory settings
<jvmarg value="-Xms2048m"/>
<jvmarg value="-Xmx2048m"/>
<jvmarg value="-XX:PermSize=32m"/>
<jvmarg value="-XX:MaxPermSize=256m"/>
Restart Admin Server or entire SOA infrastructure and we are ready to run the AIA installer.
- Make sure that Node Manager is up and running.
To check this open WebLogic Server Administration Console and navigate to Environment > Machines > LocalMachine > Tab: Monitoring > Tab: Node Manager Status
We should see – Status: Reachable and Version: 10.3
Otherwise start it up manually by issuing the following command:
[oracle@hostname ~]$ cd /u01/app/oracle/product/Middleware/wlserver_10.3/server/bin/
[oracle@uranus bin]$ ./startNodeManager.sh
TIP: Ensuring Correct Settings for Node Manager Startup
To ensure correct settings for Node manager startup:
- Navigate to the $MW_HOME/wlserver_10.3/common/nodemanager.
- Open the nodemanager.properties file and verify the value for StartScriptEnabled=true
- If you changed the above value, restart Node Manager by navigating to $MW_HOME/wlserver_10.3/server/bin and using the appropriate commands.
- While starting the node manager, ensure that you set the listen address different from “localhost”. It is preferred to give the fully qualified name of the machine or the IP address.
Temporary change on jdk home in order to avoid errors during AIA installation; do it as a root user:
[root@hostname ~]$ chown oracle:oinstall -R /usr/java/jdk1.6.0_20
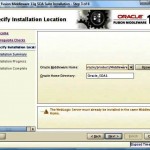
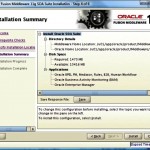
RUN THE AIA 11g INSTALLER
[oracle@hostname ~]$ cd /home/oracle/stage
[oracle@hostname ~]$ unzip Oracle AIA 11gR1 (11.1.1.2.0) Linux x86 V20956-01.zip -d AIA11g
[oracle@hostname ~]$ cd /home/oracle/stage/AIA11g/cd/Disk1/
[oracle@hostname ~]$ ./runInstaller
Specify the following path and hit enter: /usr/java/jdk1.6.0_20
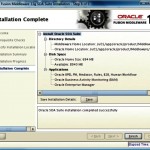
We are done with AIA 11g installation!
Rollback temporary changes on jdk home (as root user):
[root@hostname ~]$ chown root:root -R /usr/java/jdk1.6.0_20
Validate AIA installation. Navigate to the AIA Console
http://<server name>:<port number>/AIA/
- http://hostname:8001/AIA (dont’ forget to open ports on firewall)
SOA SUITE URLs:
- http://hostname:7001/
- http://hostname:7001/em/
- http://hostname:7001/console/
- http://hostname:9001/OracleBAM (Sorry folks, Internet Explorer only!)
- http://hostname:8001/AIA
1. In order to uninstall AIA 11g (3.0) navigate to $AIA_HOME oui/bin directory and run the installer with uninstall flag:
[oracle@host bin]$ cd /u01/app/oracle/product/Middleware/AIA30/oui/bin/
[oracle@host bin]$ ./runInstaller.sh -deinstall
Starting Oracle Universal Installer...
– Follow the installer to uninstall AIA application from the server.
2. Login to Enterprise Manager 11g Fusion Middleware Control
( http://hostname:7001/em ) and undeploy all “AIA…” components.
3. Next, clean the database.
– Shutdown WebLogic Server
– drop AIA schemas within the database:
SQL> DROP user "AIA_AIA" CASCADE;
SQL> DROP user "AIA_AIALIFECYCLE" CASCADE;
SQL> DROP user "AIA_JMSUSER" CASCADE;
SQL> DROP user "AIA_XREF" CASCADE;
5. Delete $AIA_HOME directory if the installer didn’t do it.
[oracle@host bin]$ rm -rf /u01/app/oracle/product/Middleware/AIA30
Cheers!
